There’s a certain routine comfort that comes with well-worn, reliable gear—until the day something unexpectedly goes silent. That’s exactly what happened with one of my PMC TB1 speakers. I came into the studio one morning, ready for another day of sessions, only to find the right-side speaker had simply stopped working. No warning signs, no gradual decline—just silence. It was a peculiar situation, especially since the failure likely happened during a session with a freelance engineer who didn’t notice the issue when it occurred. My best guess is that they were listening to music, and somewhere along the line, the right side just gave out.
After some investigation, it became clear that time had taken its toll. I’ve had this particular speaker since 2015, but it was likely manufactured in the late ‘90s. The components inside, particularly a burnt resistor and a bulged capacitor, bore the marks of age. While I didn’t conduct a detailed post-mortem on every component, the signs were evident enough: the resistor had likely failed first, passing on too much power to the capacitor and blowing it out. It was a stark reminder that even the most trusted equipment can fall victim to the inevitable wear of time.

This article isn’t about providing a detailed repair manual; instead, it’s a narrative of my journey through the process of diagnosing and fixing an unexpected issue with a beloved piece of gear. By sharing this experience, I hope to offer insights into the challenges and rewards of maintaining your own equipment. And perhaps, it might encourage you to explore what’s behind the scenes when something in your setup isn’t working quite right.
- Understanding the Crossover Network
- My Repair Journey: Personal Insights and Practical Steps
- Preparation and Safety
- Opening the Speaker and Assessing the Crossover
- Soldering with Confidence: The Role of Flux
- Reassembly and Testing
- The Reward of DIY Repairs in a Small Business
Understanding the Crossover Network

Before diving into the repair, it’s important to understand the vital role the crossover network plays in your speaker system. Think of the crossover as a traffic signal at a busy intersection, where different types of vehicles—each with their own unique requirements—need to be directed to the correct lanes to avoid chaos and ensure smooth flow.
In this scenario, the high frequencies are like nimble sports cars that need clear, fast lanes—like the tweeter—to reach their destination efficiently. Meanwhile, the low frequencies are more like heavy trucks, powerful and slow-moving, requiring the robust path provided by the woofer. If these audio “vehicles” were misdirected—sending the heavy trucks down the sports car lane or forcing the sports cars onto the truck route—the result would be inefficiency, strain, and potential damage. The woofer would waste energy trying to reproduce the high frequencies, while the tweeter could be overwhelmed and damaged by the powerful lows.
The crossover acts as the crucial traffic signal, ensuring that each type of “traffic” reaches the appropriate driver. This careful direction preserves the clarity, power, and efficiency that any two-way, three-way, or even four-way speaker system is designed to deliver. Depending on the design of the system, crossover points are set at specific frequencies—like 3kHz in this case—to ensure that high frequencies reach the tweeter and lower frequencies are sent to the woofer.
In more complex setups, such as those with subwoofers or additional mid-range drivers, these crossover points can vary significantly, ensuring that each driver handles the frequencies it’s best suited for. By managing the flow of frequencies to the correct drivers, the crossover keeps your music flowing smoothly, protects your speakers from potential damage, and ensures every note is reproduced with the fidelity it deserves.
My Repair Journey: Personal Insights and Practical Steps
The day started like any other, with me setting up for the first session. But as soon as I began, I noticed something was wrong—there was no output from the right side of my main set of speakers. These are my go-to monitors, so it was immediately clear that something wasn’t right. I quickly checked my alternate set of speakers, and they were working perfectly in full stereo. This told me that the issue wasn’t with the source or signal chain leading up to the speakers, but rather with the main speaker setup itself.
These particular speakers are powered by my custom Hafler 500 amplifier, so I decided to start troubleshooting there. I swapped the outputs on the amp to see if the problem might be a signal issue between the amp and the speakers. When I did, the left speaker continued to work while the right side remained silent, ruling out the amplifier as the source of the problem. Next, I swapped the connections on the back of the speakers to check the speaker cables themselves, but the issue persisted. This confirmed that the cables were fine, and the problem likely lay within the speaker itself.
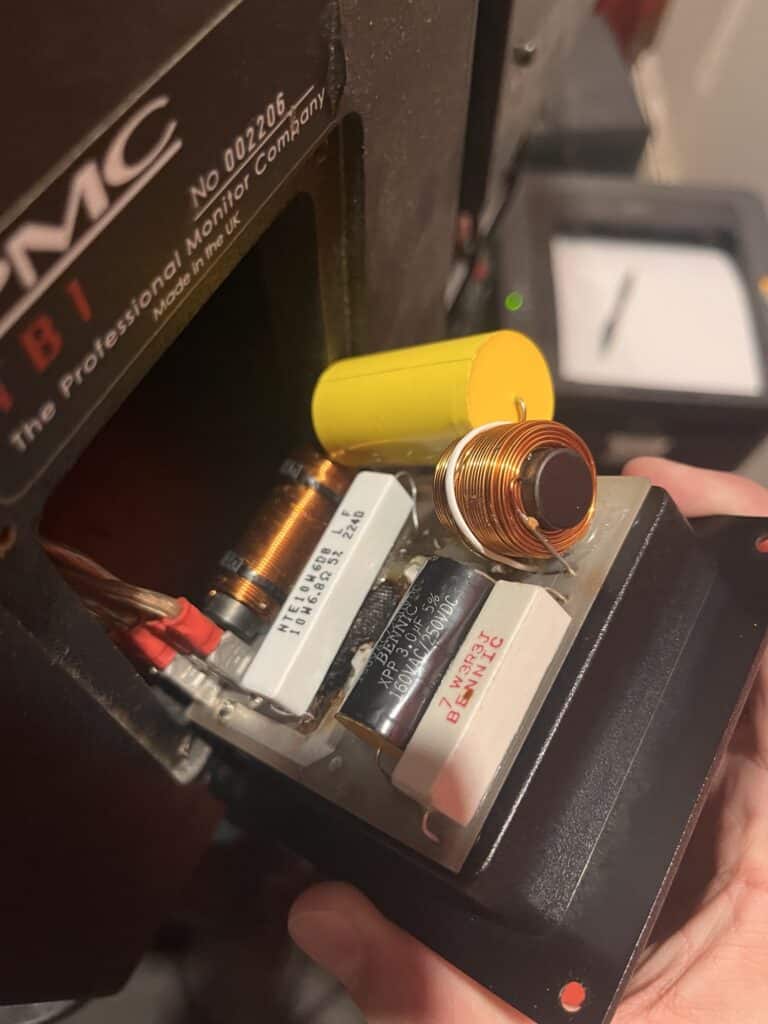
As I examined the right speaker more closely, I noticed a faint smell of burnt electronics. That was my first real clue. These speakers are bi-ampable, but in my setup, they use an internal crossover, which I now suspected might have failed. I opened up the speaker terminal and immediately found the crossover directly attached inside. It didn’t take long to spot the problem—several of the components had clearly suffered damage, confirming my suspicion that the crossover had indeed bitten the dust.
Given the age of the speaker and the limited repair options available—especially in the St. Louis area—I realized that my options for replacement and repair were pretty limited. Sending the unit out for professional repair would likely mean a long wait and significant expense, and finding a facility nearby with the necessary expertise could be a challenge. With these constraints in mind, I knew that taking matters into my own hands was not just the fastest solution but also the most affordable one available to me.
Preparation and Safety
Before you begin any repair, safety should always be your top priority. For powered speakers, this means ensuring the unit is completely unplugged. In my case, the PMC TB1s are passive speakers, so once they were disconnected from the amplifier, I was ready to proceed. Remember, while speaker repairs are generally safe, it’s always wise to err on the side of caution. If you’re not confident in your ability to complete the repair, consulting a professional is never a bad idea.
Opening the Speaker and Assessing the Crossover
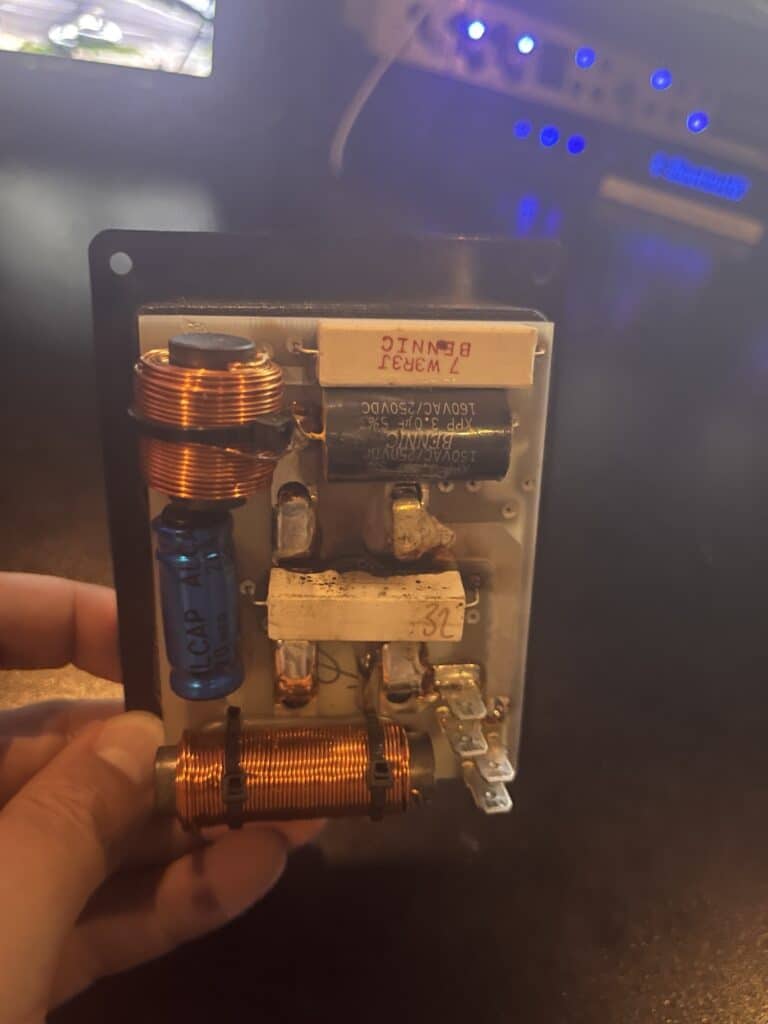
With the back panel removed, the damage to the crossover was immediately clear. The main resistor responsible for the woofer side of the circuit was completely charred, showing significant signs of overheating. Even the PCB bore the scars of the damage. Right next to it was the capacitor in the circuit, and compared to the crossover in the functioning speaker, this one was noticeably bulging—a textbook indicator that it needed replacement. Testing the resistor confirmed my suspicion: it was noncontinuous. With the state of the capacitor and its 25 years of use, it was easy to decide that both components were due for replacement.
I began researching replacement parts and found that, while electronics distributors offered a wider range of components, time was of the essence. I opted to order the parts through Amazon, prioritizing speed over selection and price. In my mind, getting the speaker back to full operation was well worth any slight compromise in cost. Fortunately, I was able to find components with the correct values, even though they were a bit larger than the originals. Fortunately, space inside the speaker wasn’t an issue, so the size difference wouldn’t pose a problem.
Though the delivery took a little longer than I had hoped, the parts were in hand by the end of the week, ready for installation and the next phase of the repair.
Soldering with Confidence: The Role of Flux
One of the most valuable lessons I’ve learned over the years is the importance of using flux when soldering—this repair really drove that point home. In the past, I had only used flux when it was already included in rosin-cored solder, so I hadn’t fully appreciated how much of a difference it could make when applied manually. This time around, I decided to use separate flux before soldering the new components, and the results were eye-opening. Applying flux made the soldering process smoother and more precise, ensuring strong, reliable connections with minimal resistance.
The difference was noticeable right away. The solder flowed more easily onto the components, and the connections felt more secure. For anyone tackling a similar repair, I can’t recommend flux highly enough—it’s an absolute game-changer. It not only makes the job easier but also gives you confidence that the connections will hold up over time.
After desoldering the old, damaged capacitors and resistors, I carefully installed the new components, ensuring that each connection was double-checked to avoid any potential issues down the line. Now that I’ve experienced the benefits of using flux firsthand, it’s something I’ll never skip again in future repairs.
Reassembly and Testing
Once the new components were securely in place, I reassembled the speaker, feeling confident that everything was back in order. But when I connected the TB1 to the amp and fired it up, nothing happened. At first, I was puzzled—I was sure I had done everything right, so what could be the problem?
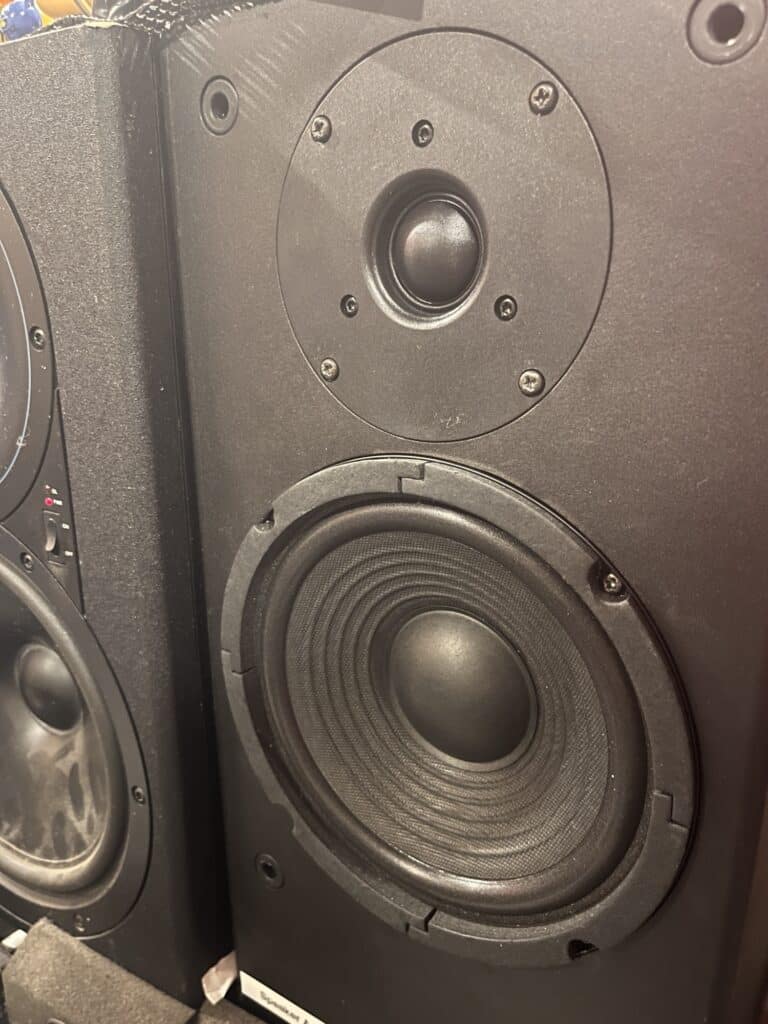
Then it hit me: “I bet the speakers themselves got fried when the power surged through the crossover.” Sure enough, after swapping out the damaged speaker components with new ones, the system sprang back to life. It was a relief to hear the sound come through again, knowing that the repair had successfully brought the speaker back online.
With everything back in working order, I plan to perform the same update on the crossover in the other speaker in the coming weeks to ensure the pair remains identical and up to spec.
The Reward of DIY Repairs in a Small Business
Running a small business like Suburban Pro Studios, where equipment is both an investment and a lifeline, means every dollar and minute counts. Sending the TB1 out for repair would have been costly and time-consuming, leaving me without one of my key tools. Instead, by handling the repair myself, I not only saved money but also learned more about the inner workings of my equipment. This experience reinforced my belief that maintaining and repairing your gear is not just about saving costs; it’s about deepening your understanding and appreciation for the tools you use every day.
Repairing the crossover in my PMC TB1 speaker was more than just a technical task—it was a journey of rediscovery. It reminded me of the importance of understanding your equipment, not just as a user but as someone who appreciates the craft and engineering that goes into each component. For those who share a similar passion, I hope this article inspires you to take on your own repair projects. And for potential clients of Suburban Pro Studios, know that when you work with us, you’re working with a team that values and understands the tools of the trade, ensuring you get the best possible sound every time.
Let me know what you think!
Send me an email at
matt@suburbanprostudios.com