Upstairs Engineer Guide
Revision 2025.10.10
If you need any help!
Don’t hesitate to call or text Matt at 618-407-8269.
If you have questions before your session you can also reach out to Matt with anything you need.
Be sure to familiarize yourself with the patchbay layout on the last page as it may help with any issues that arise.
IMPORTANT!
PLEASE RETURN THE STUDIO TO THE STATE YOU FOUND IT IN.
Make sure to return any cables, stands, instruments, headphones, and anything else to the red bin in the cable closet at the end of your session.
We have a roster of different engineers and freelances that use the studio and gear needs to return to its original state for the next session.
Computer
Keep in mind that many people use the studio and have different setups when they are working so you may have to set the studio up to your needs.
It is a great idea to RESTART THE COMPUTER BEFORE YOU BEGIN TO WORK. This will usually solve any bluetooth or audio problems that may come up.
Freelance Login
The Mac Mini in the upstairs studio is available for your use and has ProTools among other DAW’s installed. You can login to the Freelance account to use it.
Account: Freelance
Password: brucelee808
Wireless Internet
We have wireless internet available everywhere in the studio for our guests. Our guest network requires a password to login.
Network: Suburban Pro Studios Guest
Password: mspacman
You can also scan this QR code or any of the QR codes placed around the studio.

Lighting and Power
The studio is automated to power up before your session and power down after your session ends. The lights, power to equipment and HVAC settings should all be set to their defaults when you arrive, but if you’d like to adjust things feel free!
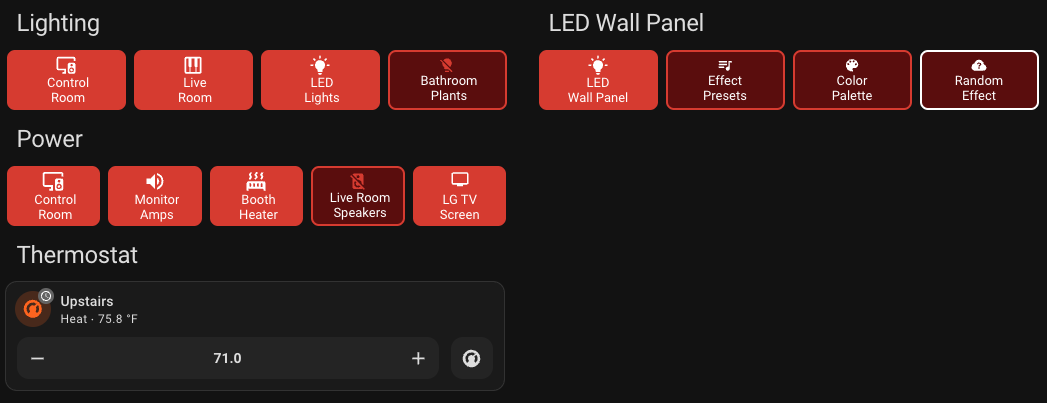
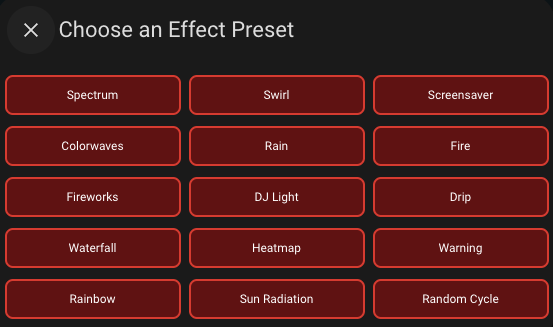
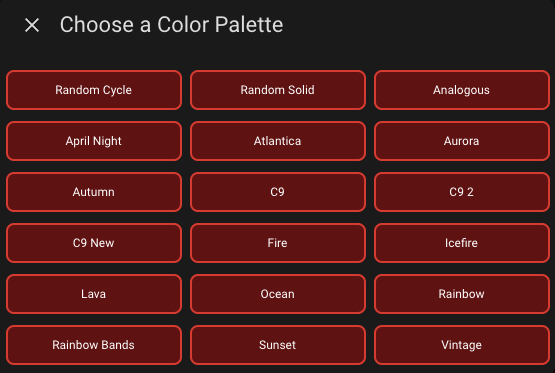
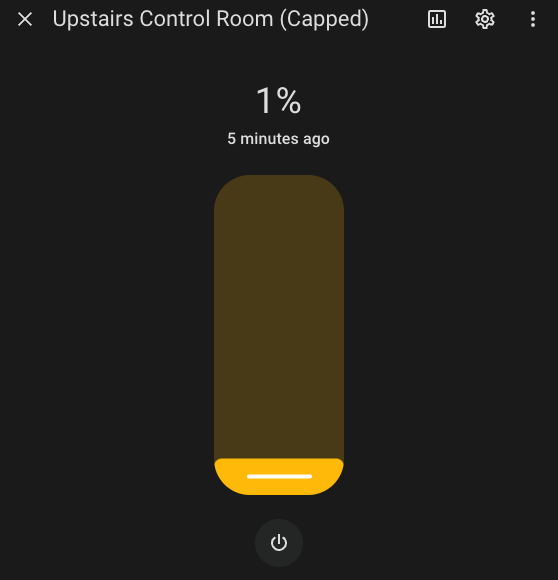
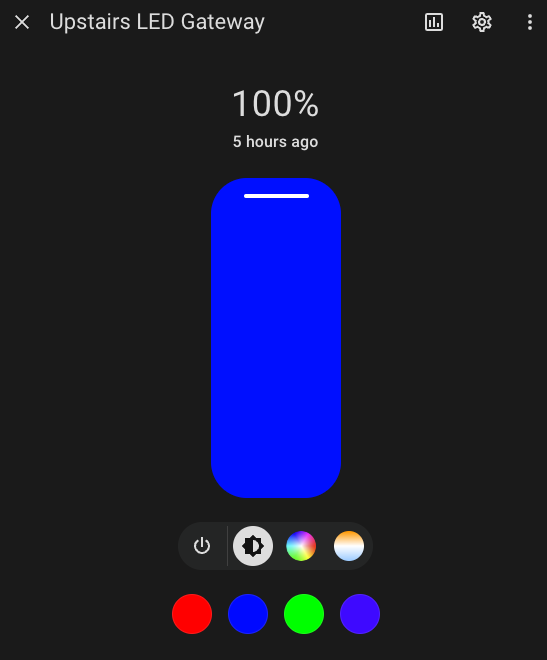
There is a remote control on the desk that can adjust all of the settings for the studio from the desk. You can turn on and off lighting, heaters, AC as well as set the preset for the LED wall panel.
Each of the lights are dimmable and pressing on the button for the light will bring up a dialog to set the brightness or color.
Pro Tools
Our studio is setup to use Pro Tools as it’s default DAW. You can use other DAW’s as well, but Pro Tools is the standard in our studio.
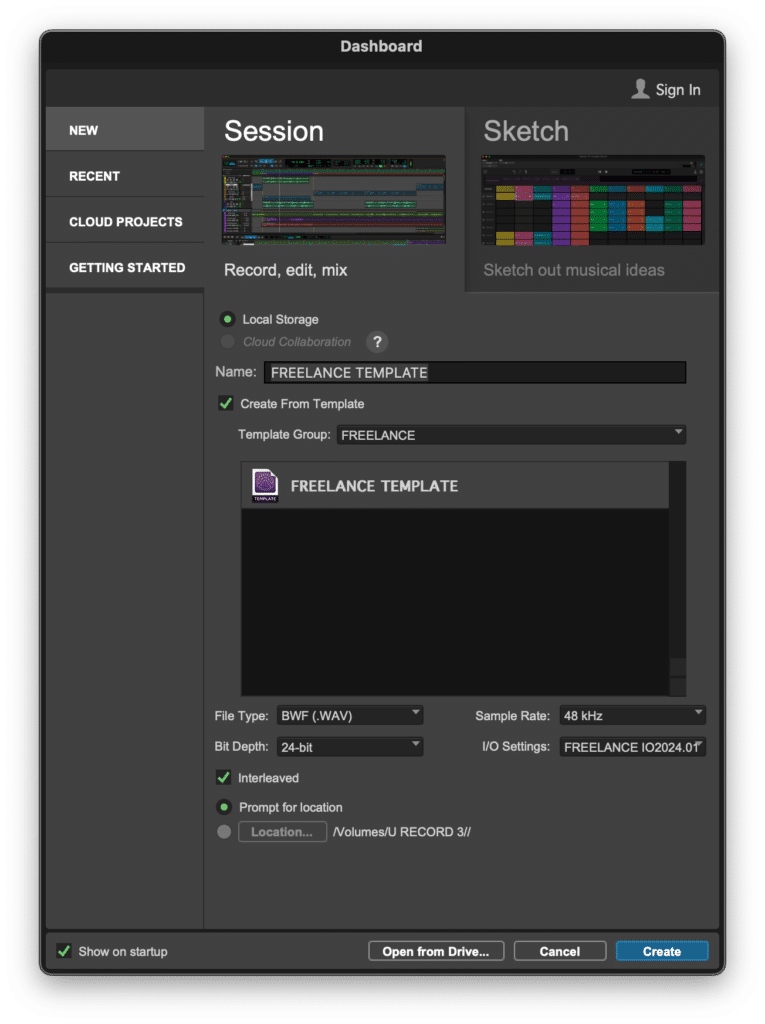
We’ve made a template for freelancers that can be used to get started quickly in the studio. Make sure to use the settings listed above when starting your session for a trouble free beginning to your recordings.
For Freelance Engineers we have a default IO set up for you to use. It may be easiest to import your outside sessions if you’re unfamiliar with the IO settings of Pro Tools.
The Playback Engine that you need to use in Pro Tools is named Scarlett 18i20. Other settings will lead to issues and you should verify your settings when starting your session.
Other DAWs
You’re welcome to use any DAW we have. Our current list is Pro Tools, Logic, Studio ONE and FL Studio.
If you have any questions about the studios DAW’s reach out!
NOT SURE ABOUT PREAMPS AND COMPRESSORS?
Feel free to plug the microphone directly into the interface and skip all outboard gear.
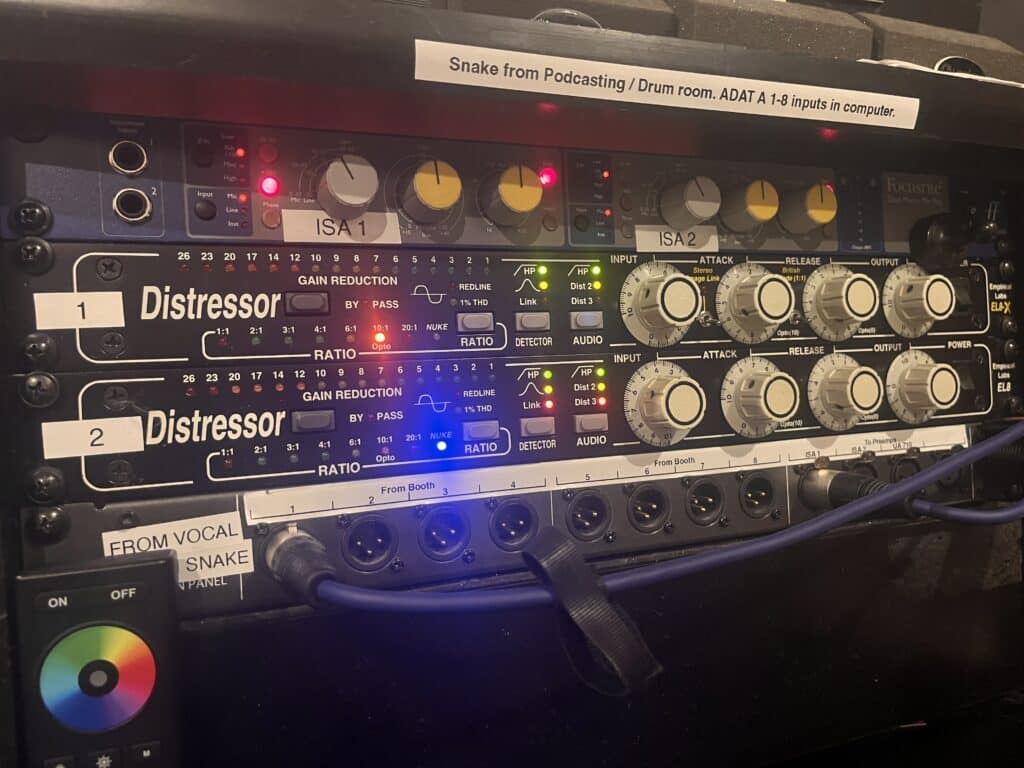
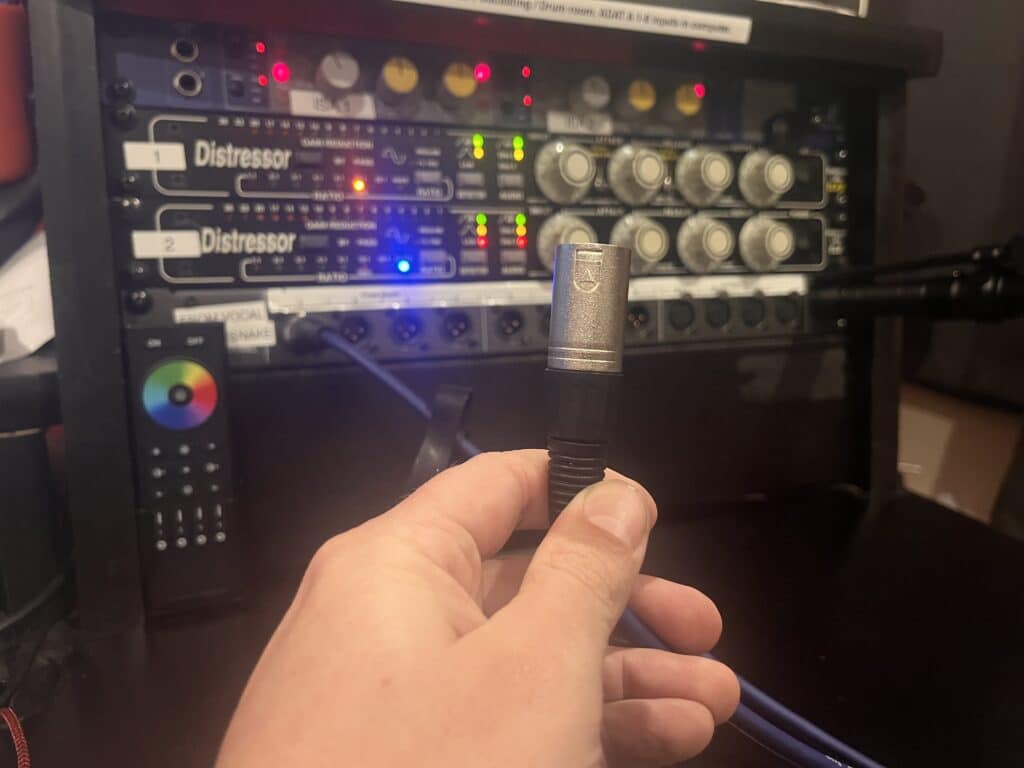
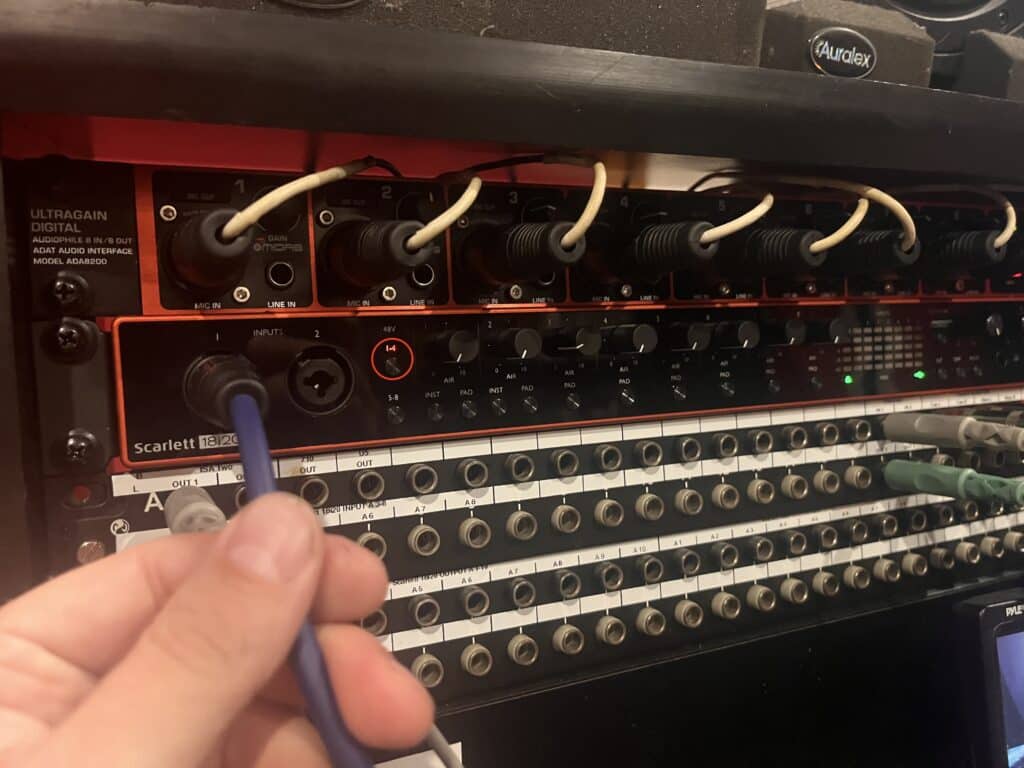
Take the blue XLR cable and patch it from the booth output to input 1 on the Scarlett 18i20. The pictures below show the steps.
NOT GETTING MIC SIGNAL?
Make sure to turn on Phantom Power for your microphone.
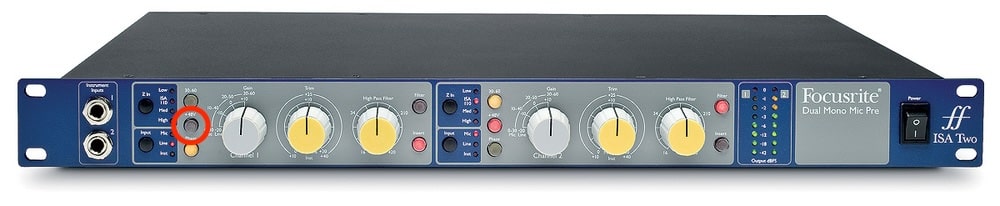
The Phantom Power button for Channel 1 of the ISA preamp is circled in red in the image above. Make sure that button is lit up RED.
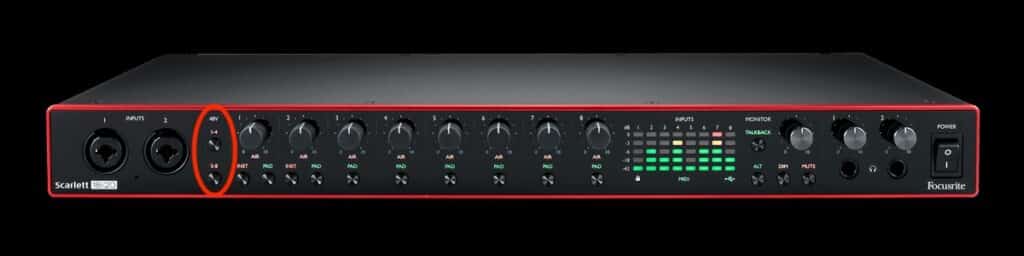
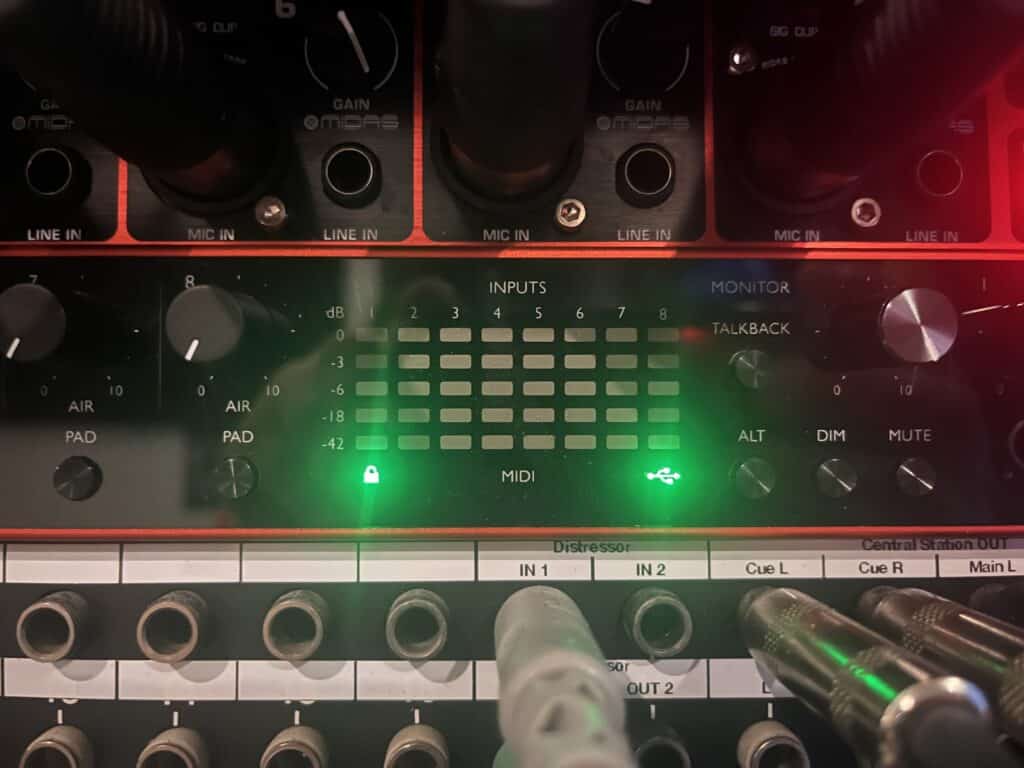
The Phantom Power buttons for Channels 1-8 of Scarlett 18i20 are circled in red in the image above.
Studio Monitors
Our studios use the Central Station monitor controller to control our speakers. We have 3 monitor outputs set up in the studio. You can control their inputs and select which speakers you want to use on the Central Station remote.
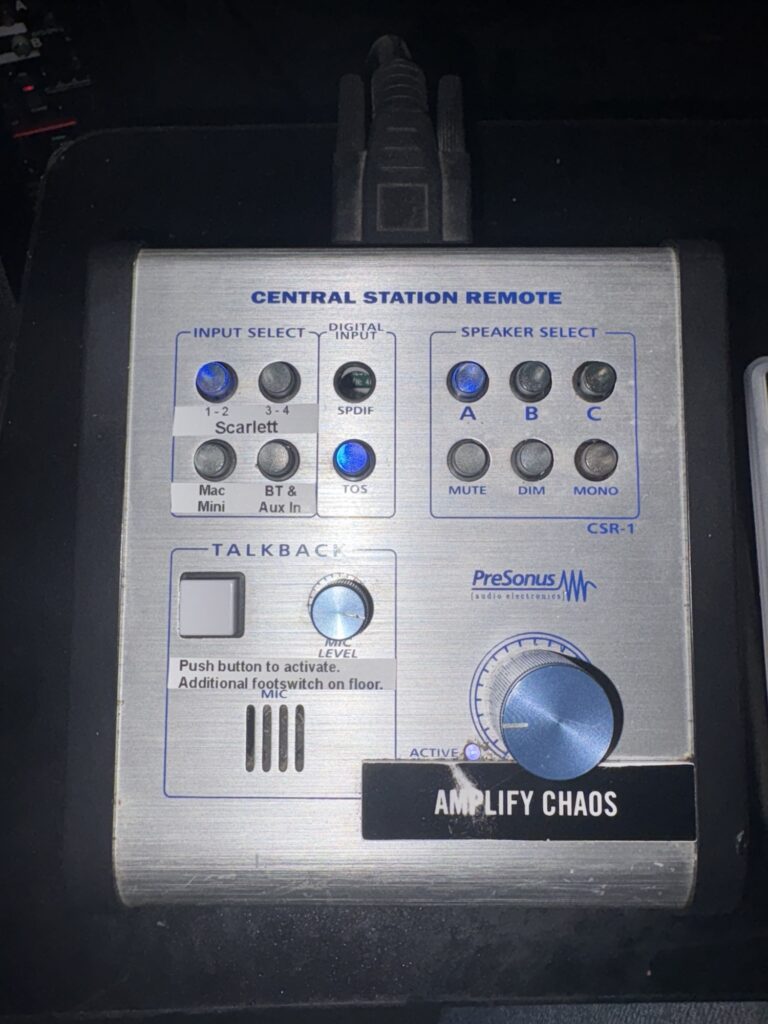
In the picture above, Scarlett 1-2 is selected as the input. You can select one input at a time from any of the 4 inputs available.
Scarlett 1-2 – any DAW outputting on 1-2 of the Scarlett 18i20
Scarlett 3-4 – any DAW outputting on 3-4 of the Scarlett 18i20
Mac Mini – Mac Mini audio out via LG Monitor (any sounds playing from the computer)
BT & Aux In – Bluetooth input or Aux In from the Bluetooth receiver
In the picture above, the PMC monitors are selected for monitoring. You can select one set of speakers at a time from any of the 3 available.
A – PMC speakers | TB2a’s powered by Hafler 500 amp teamed with Focal subwoofers.
B – Mackie HR824 speakers
C – Behritone
There is a talkback button located on the remote as well as a footswitch on the right side of the floor at the desk.
Headphones System
You can choose independent sources for the Cue and Main sections of the Central Station. This enables you to listen to one source in the control room while the artist listens to a different source through the headphone system.
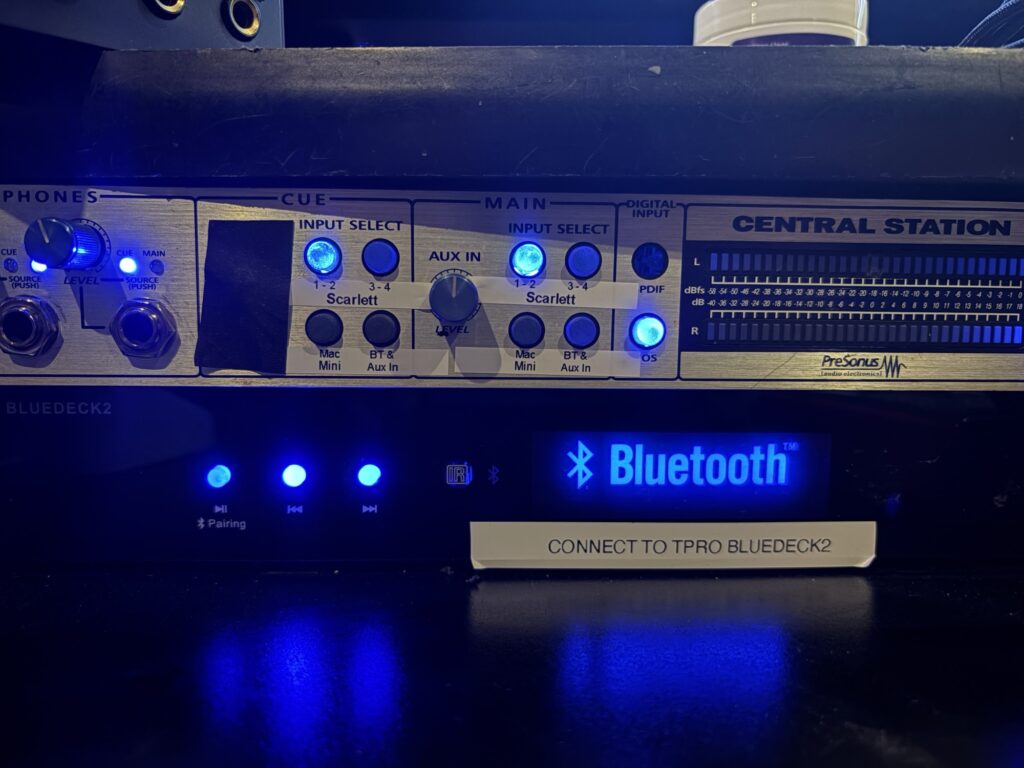
The Cue system selects which source plays through the headphones system. Often times you would want it to be set to Scarlett 1-2, but you can change it if you need!
The Main system is what plays through the monitors in the control room and mirrors the selections made by the Central Station remote.
Microphone
There is a microphone set up in the vocal booth at all times and patched in for you get to using easily. It is typically routed with outboard mic preamps and compression. If you’d like to use this routing, you will need to verify that Phantom Power (+48v) is active on the preamp. Most of the time this is the ISA 1 preamp located on the top of the top right rack of the studio desk.
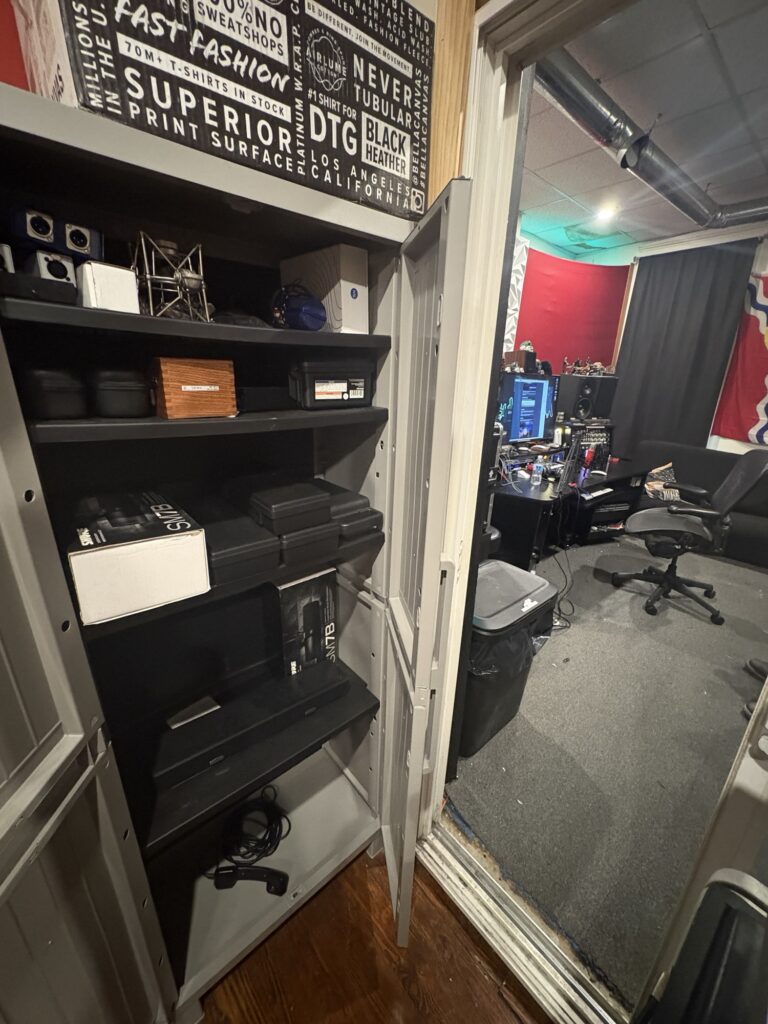
You can choose to record in the vocal booth or at the desk. There is a moveable scissor style mic stand available with a Rode NT1 microphone attached on the left set of shelves in the control room. This mic already has a shockmount and pop filter attached as well. The scissor style stand attaches with a clamping mount, and by lifting at the base you can transfer the stand post from the shelves clamp to the clamp located on the studio desk.
Hard Drives
The studio has a backup system running that duplicates the recorded data two times each night. In order to make sure your data is backed up and safe, it’s important to only use the U RECORD drive to record your sessions.
Create a folder inside of the U RECORD with your artists name and place all of your sessions and recording inside of that folder. This will make recalling your data in the future much easier.
Aux Input
An easy to access Aux In is available underneath the Central Station monitor controller. You can grab an aux cable from the pouch on the desk and connect to the input on the Bluetooth receiver.
We have a Bluetooth receiver available if you’d like to stream beats, music, or other audio. You can connect to it by pairing to the TPRO Bluedeck 2 Bluetooth device. This unit is located directly on the desk underneath the Central Station monitor controller.
Equipment
You can download drivers for the Focusrite 18i20 interface at this link:
You can easily choose to use the Scarlett interface with our computer or connect it to your computer to use your own system. We have a USB switch available underneath the audio interfaces to support easy connections. Make sure the correct USB is chosen when starting your session.
This switch is a USB C type, and we have a black bag available with the different cable you might need to connect to the system.
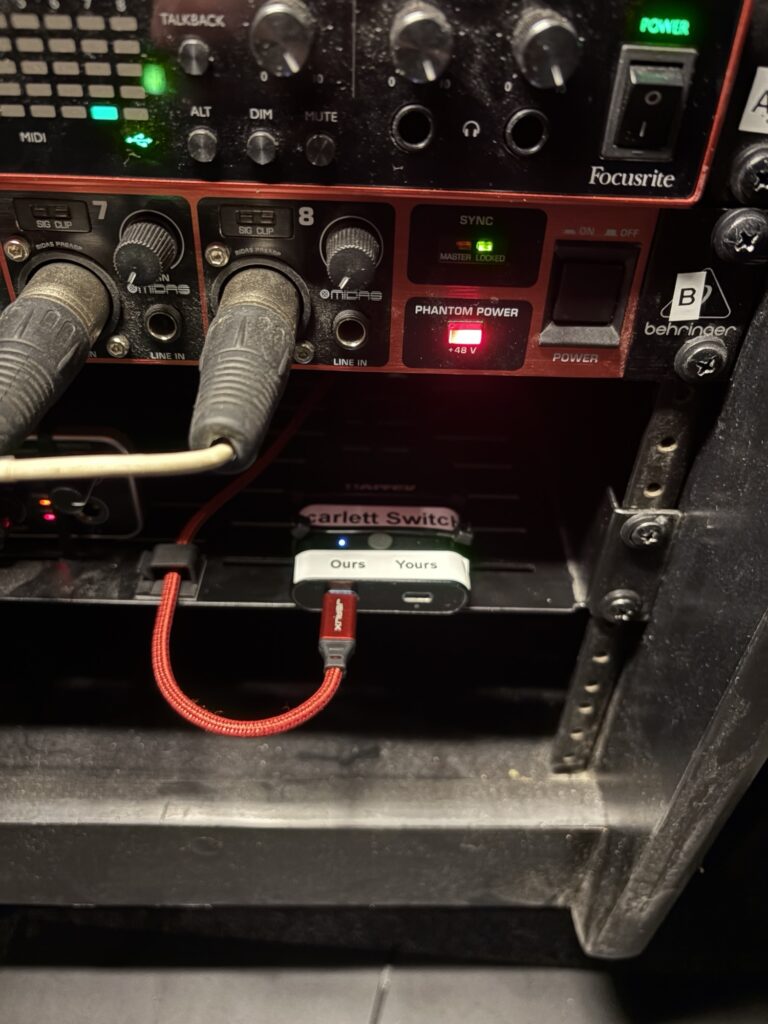
When checking the switch, you can verify connection by looking for the lock symbol on the Scarlett interface. When properly connected it will light up green. When unconnected it does not show up. Try unplugging and replugging the cable if you aren’t seeing it immediately.
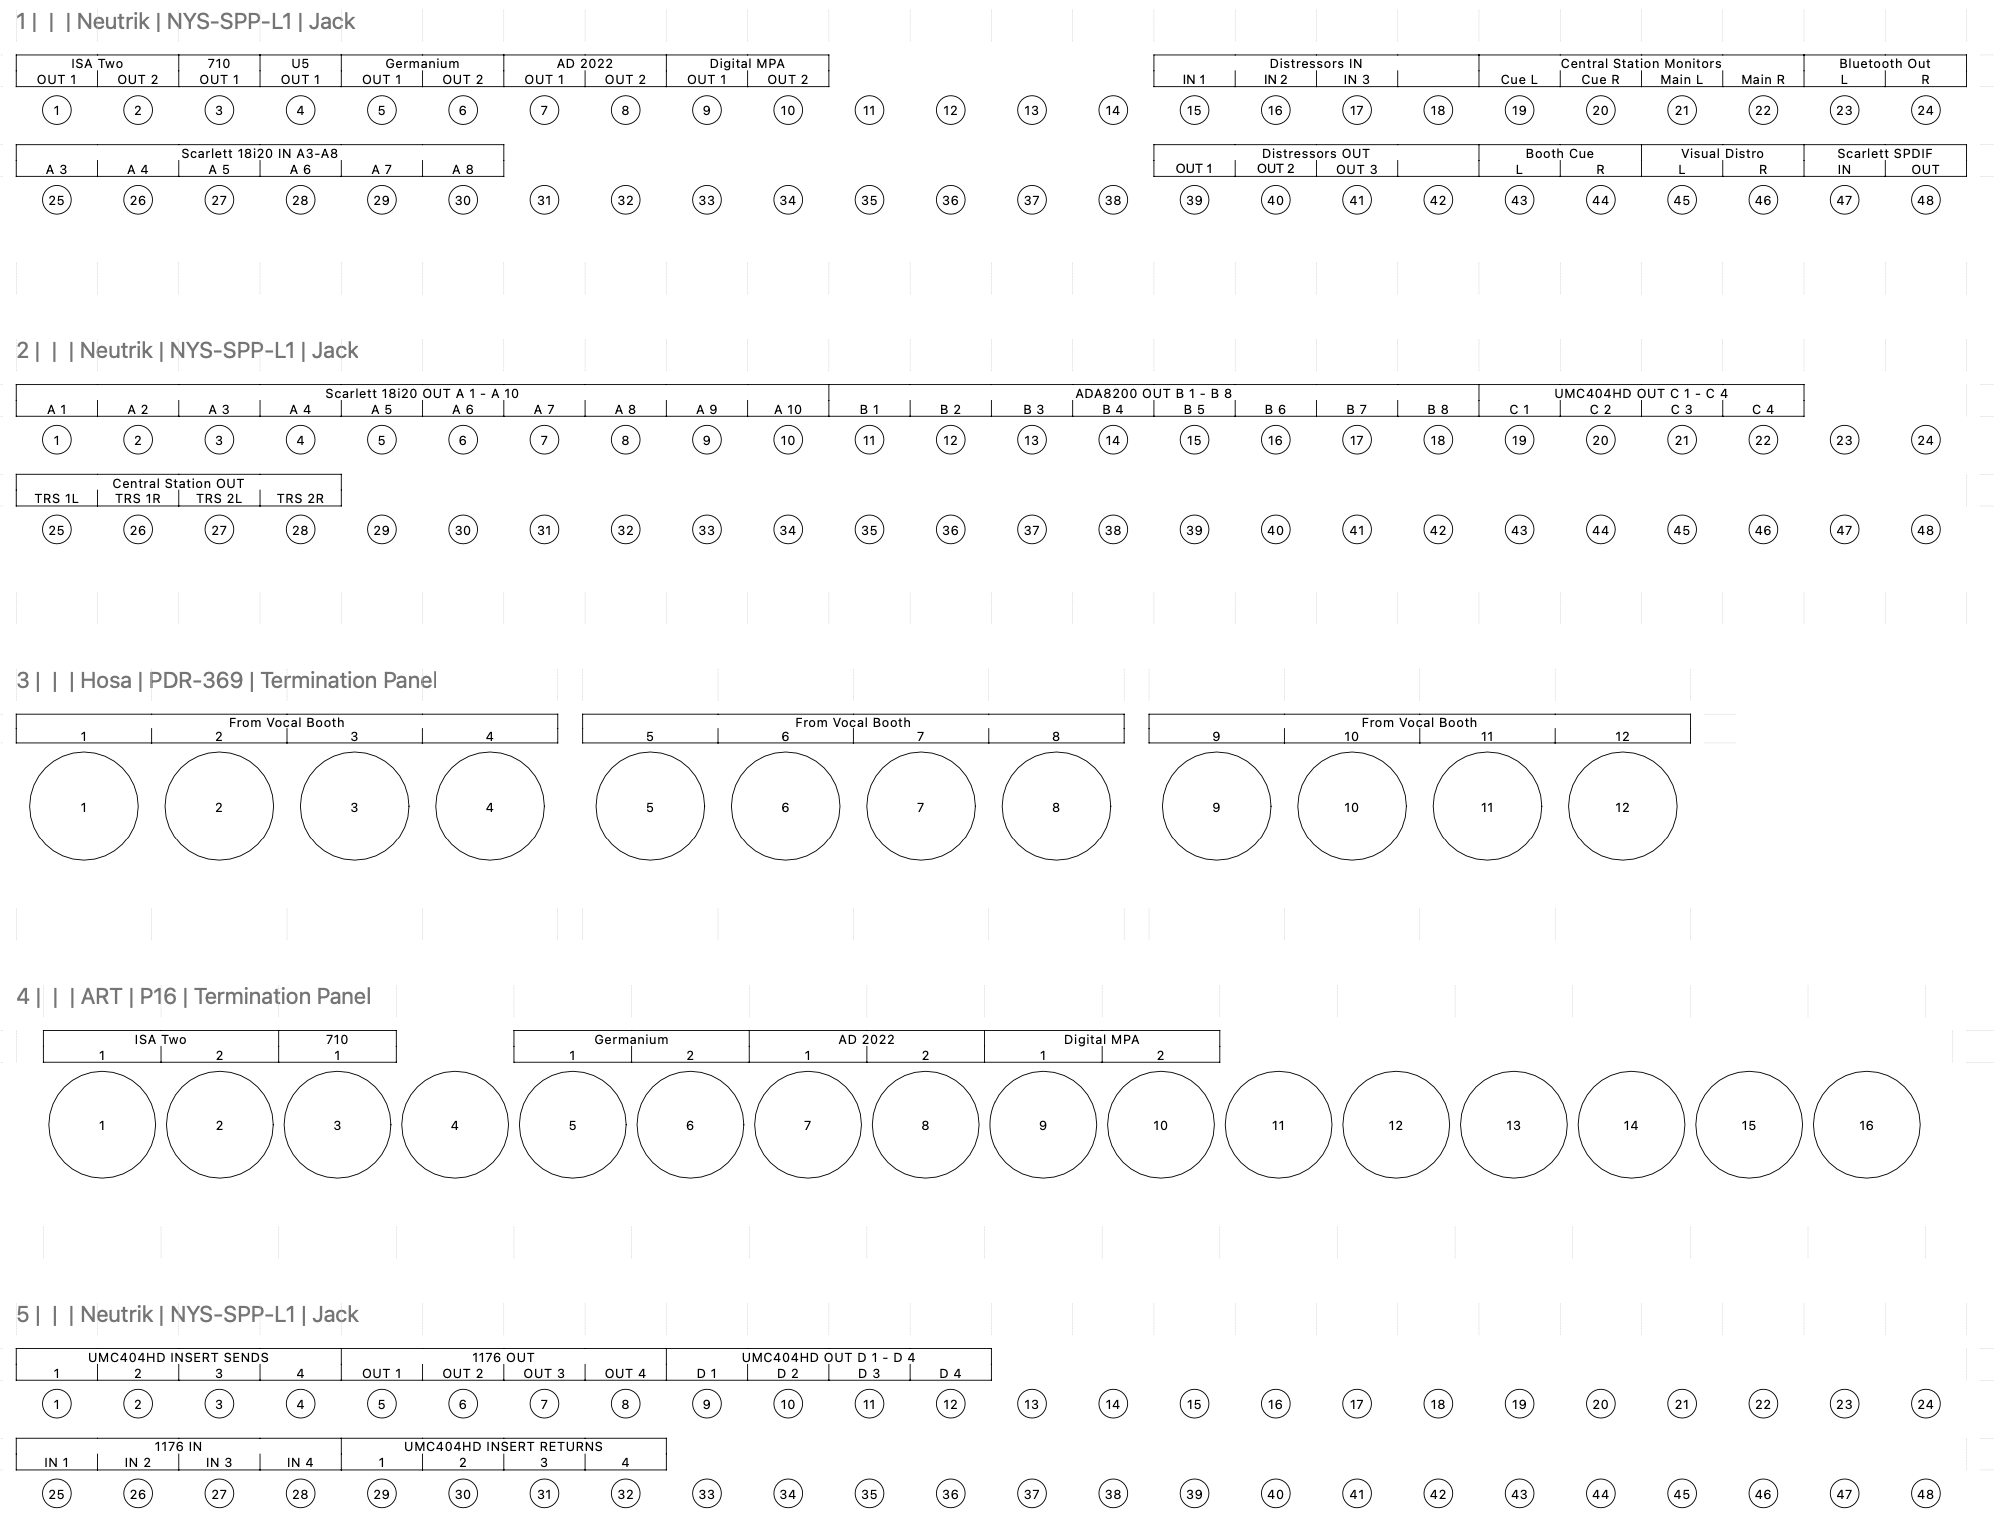
This studios centerpiece is the Focusrite Scarlett 18i20. It has 8 analog inputs and 10 outputs (available in TRS patchbay), 8 digital I/O (available thru an 8-channel ADA8200 via ADAT), & 2 SP/DIF (currently unused) available for a total of 20 inputs and 18 outputs. We also have two Behringer UMC404HD interfaces for additional inputs and outputs. A 12×4 snake connects the studios booth to the XLR patchbay, and a 12×4-channel snake connects to the podcast room.
There is an XLR patchbay in the studio to route the microphone signals to the preamps you prefer. You select the XLR out from the Booth Snake and route it to the input of the Preamp you have chosen to use.
The Behringer AD8200 is next on our inputs with B 1-8. You can use either the XLR or TRS input on the preamps.
The Behringer UMC404HD interfaces are inputs C and D.
Outputs for each device are available in the patchbays.
The Central Station has MAIN and CUE monitoring sections, with the CUE section being normalled to the headphone system. You can select the input of the CUE section on the front panel of the Central Station, while the MAIN section can be chosen from the remote or front panel.
The talkback is accessible from the Central Station remote as well as a footswitch on the right side of the desk.
The remote on the keyboard tray controls volume, input, and speakers. DAWs audio can be selected through the Scarlett 1-2 input on the remote. Alternate headphone mixes can be monitored the Scarlett 3-4 selector on the remote. Mac Mini monitors the computer and BT & Aux In monitors anything connected to the Bluetooth receiver underneath the Central Station rack unit.
The PMC speakers are paired to the Focal subwoofers and are selectable from Speaker Output A. Speaker Output B selects the Mackie HR824s, and C selects the Behritone mixcube.
Patch cables as well as any other cables you’ll need are located in the podcast/drum room next to the Control room. Extra mic cables, patch cables, and computer cables are stored on cable hooks or in storage hanging on the back side of the closet doors.
Studio Rates
DIY/FREELANCE
$30/hour
4 block for $100
Mixing and Mastering
$25/song for mastering 2 track mixes.
$65/hour for mixing and mastering.
All rates include 2 revisions and .wav and .mp3 masters.
Food
There are several local restaurants within minutes of our studio, many available for delivery as well!
For delivery orders, our studio is located at the corner of Jefferson and Chippewa, next door to the Phillips 66 Gas Mart. The address of the studio is:
3739 S Jefferson Avenue
St. Louis, MO 63118
Amenities
We have warm and cold bottles of water available at any time for your needs! The refrigerator is located in the wooden door closet of the podcast/drum room. Feel free to use it as you need, but we clear it out frequently so no long term storage.
A microwave is available above the refrigerator if you require it.
Smoking
There is NO SMOKING cigarettes in our studio. Please refrain completely from smoking cigarettes in our facility. The entrances of the studio are designated for cigarettes, cigars, and similar products. Smoking marijuana is allowed inside the studio and booths but please be respectful of the studio and equipment.
Patchbay
Below is an image of the patchbay layout in the upstairs studio. Half-normalled connections are labelled and unnormalled connections are unlabeled.